
Post by Lady Idril on Aug 7, 2006 21:49:18 GMT -5
Mr friend Camilla asked me to do a colorization tutorial eons ago, and I've finally done it.
You'll need a basic knowledge of PSP9, I think, to do this - simply because I don't explain things well, and I always confuse people Anime said she'd try to translate it to Photofiltre if it's possible. Yay!
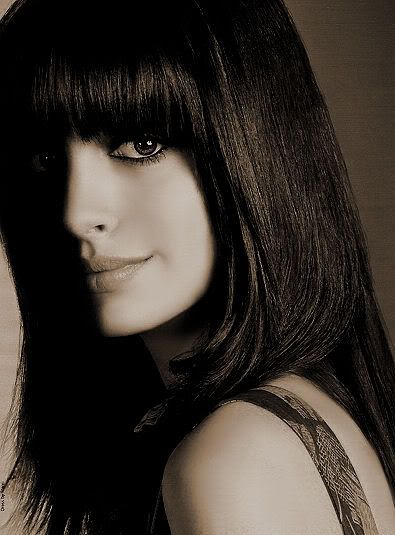
We'll start out with this lovely image of actress Anne Hathaway from hires_hotties:
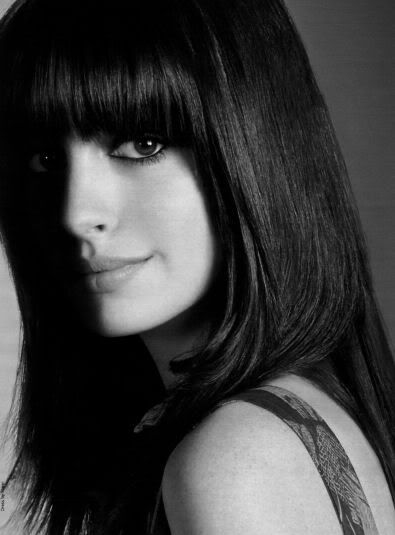
Now it's a little blurry from being resized by myself, so I'm going to sharpen it twice:
Adjust>Sharpness>Sharpen (x2)
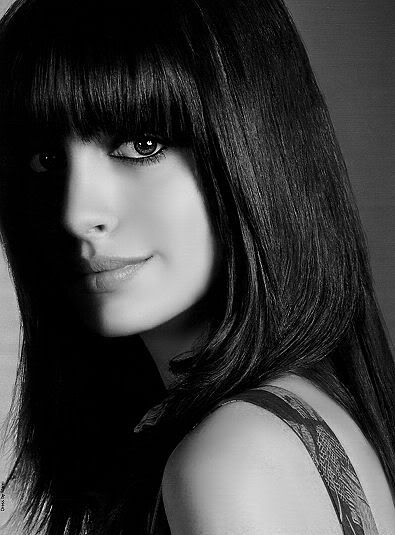
Which will give us this result:

Much better. But the skin looks a little noisey. So I'm going to use the smudge tool (Hardness: 38; Opacity: 41) on just the skin (NOT the eyes or lips!!) to smooth it out. I also want to sharpen the eyes so I'll go over them with the sharpen tool (Hardness: 20; Opacity: 50). Remeber not to sharpen outside the eye.
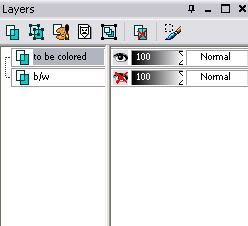
Now, I always like to have a duplicate of the image I'm working on, in case I want the original black and white image back. So I'm going to copy (CTRL + C) and paste (CTRL + L), duplicating the image. The bottom layer I'm going to set as Invisible (by clicking the eye icon beside the layer in the Layers Toolbar).
Now we can start colorizing! We'll start with the skin. There are several different methods, and I'm going to use both. But we're going to start with the Color Balance:
NOTE: make sure you have the top layer selected.
Adjust>Color Balance>Color Balance
Using these settings:
Highlights: 29, 6, -7
Shadows: 13, 2, -4
Midtones: 70, 0, -70
Be sure to check the Preserve Luminance box.
And we get this result:
This layer is always going to stay on top of the layer's we're going to create next.
Now I'm going to copy and paste my b/w original again (if you've been following these steps, you should be able to click CTRL + L and see your b/w). [We're going to work on this layer before dragging it below the previously colored layer.]
I like the coloring used on her skin, but I want to make it darker. I found this little trick tends to work well:
We're going to apply color balance first:
Adjust>Color Balance>Color Balance
Using these settings:
Highlights: -11, 6, -47
Shadows: 13, 2, 19
Midtones: -20, 36, -57
Be sure to check the Preserve Luminance box.
But now I'm going to adjust it further:
Adjust>Hue and Saturation>Hue/Saturation/Lightness
Using these settings:
Hue: 30
Saturation: 23
Lightness: -10
I like the way this turned out, but I want it darker so I'm going to repeat the Hue/Saturation/Lightness effect again.
And we get this result:
Now I'm going to drag our skin layer to the top. (just click and drag in the Layers Toolbar) Here comes the slightly complicated part (hah!). Right-click on your skin layer and select New Mask Layer > Show All.
EXAMPLE
(the image is too big for here since it's a screenshot)
Once this is done, I'm going to take the paint brush tool (Hardness: 0; Opacity: 100). I've learned to work very well with the 0 Hardness brush, but you can adjust that setting to your fancy.
NOTE: make sure your brush's colors are set to black as the foreground and white on the background.
Using the brush, color the subject's hair. This basically works as an eraser, removing the top layer so the bottom is visible. I also let the brush go on the background.
NOTE: If you make a mistake and color something you didn't want or if you want to make little adjustments you can switch the brush to white as foreground and black as background, it will basically replace the area you're brushing.
When you're finished, select Layers>Merge>Merge Group and then Layers>Merge>Merge Visible.
The result:

Now we can repeat this process again for the dress. I'm going to add a Hue/Saturation/Lightness effect to black and white layer once more:
Hue: 0
Saturation: 31
Lightness: 0
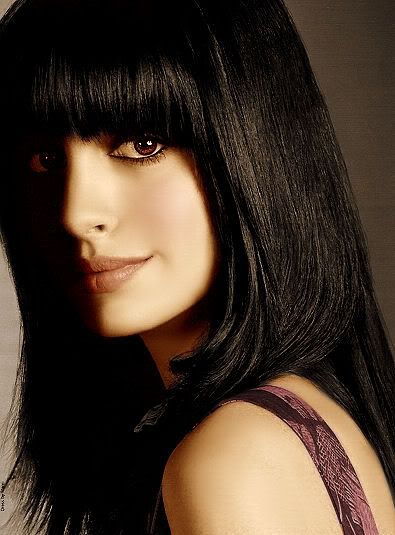
Again, select the Mask option on your perviously merged layer and this time color the dress. We get this result:
(Don't forget to merge your layers when you're done)

Again, I'm going to duplicate my b/w image and color this one pinkish, for the subject's lips and cheeks.
I used Color Balance with these settings:
Hilights: 15, -11, -10
Shadows: 17, -15, -17
Midtones: 70, -11, -70
I'm also going to use this to color her eyes.
NOTE: When you do the cheeks I find it's best to use a very large brush and lower the opacity quite a bit. I used Size: 90; Hardness: 0; Opacity:46
The result:
Now I'm going to repeat the process, but I'm leaving the b/w image as b/w. This is going to make a HUGE difference, people! Create the mask and color the whites of her eyes and the black areas of the pupil.
The result:

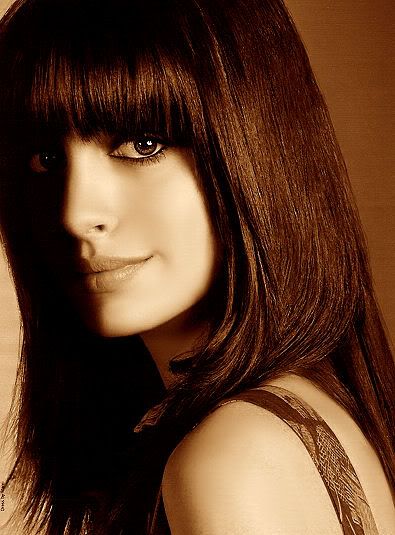
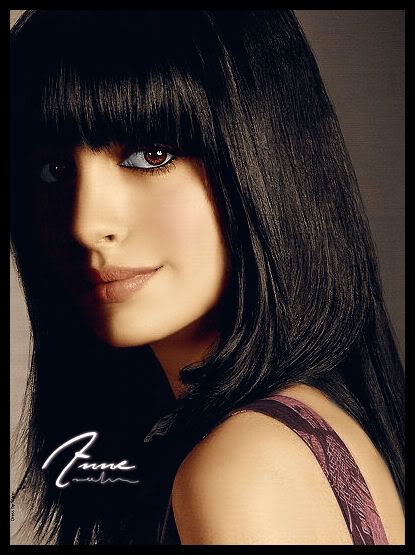
Now you can finish with this, or add more effects.
I'm going to add a new layer filled with #010611 and set it to Exclusion. I also added text and a border, and here is my finished colorization:
You'll need a basic knowledge of PSP9, I think, to do this - simply because I don't explain things well, and I always confuse people
 Anime said she'd try to translate it to Photofiltre if it's possible. Yay!
We'll start out with this lovely image of actress Anne Hathaway from hires_hotties:
Now it's a little blurry from being resized by myself, so I'm going to sharpen it twice:
Adjust>Sharpness>Sharpen (x2)
Which will give us this result:
Much better. But the skin looks a little noisey. So I'm going to use the smudge tool (Hardness: 38; Opacity: 41) on just the skin (NOT the eyes or lips!!) to smooth it out. I also want to sharpen the eyes so I'll go over them with the sharpen tool (Hardness: 20; Opacity: 50). Remeber not to sharpen outside the eye.
Now, I always like to have a duplicate of the image I'm working on, in case I want the original black and white image back. So I'm going to copy (CTRL + C) and paste (CTRL + L), duplicating the image. The bottom layer I'm going to set as Invisible (by clicking the eye icon beside the layer in the Layers Toolbar).
Now we can start colorizing! We'll start with the skin. There are several different methods, and I'm going to use both. But we're going to start with the Color Balance:
NOTE: make sure you have the top layer selected.
Adjust>Color Balance>Color Balance
Using these settings:
Highlights: 29, 6, -7
Shadows: 13, 2, -4
Midtones: 70, 0, -70
Be sure to check the Preserve Luminance box.
And we get this result:
This layer is always going to stay on top of the layer's we're going to create next.
Now I'm going to copy and paste my b/w original again (if you've been following these steps, you should be able to click CTRL + L and see your b/w). [We're going to work on this layer before dragging it below the previously colored layer.]
I like the coloring used on her skin, but I want to make it darker. I found this little trick tends to work well:
We're going to apply color balance first:
Adjust>Color Balance>Color Balance
Using these settings:
Highlights: -11, 6, -47
Shadows: 13, 2, 19
Midtones: -20, 36, -57
Be sure to check the Preserve Luminance box.
But now I'm going to adjust it further:
Adjust>Hue and Saturation>Hue/Saturation/Lightness
Using these settings:
Hue: 30
Saturation: 23
Lightness: -10
I like the way this turned out, but I want it darker so I'm going to repeat the Hue/Saturation/Lightness effect again.
And we get this result:
Now I'm going to drag our skin layer to the top. (just click and drag in the Layers Toolbar) Here comes the slightly complicated part (hah!). Right-click on your skin layer and select New Mask Layer > Show All.
EXAMPLE
(the image is too big for here since it's a screenshot)
Once this is done, I'm going to take the paint brush tool (Hardness: 0; Opacity: 100). I've learned to work very well with the 0 Hardness brush, but you can adjust that setting to your fancy.
NOTE: make sure your brush's colors are set to black as the foreground and white on the background.
Using the brush, color the subject's hair. This basically works as an eraser, removing the top layer so the bottom is visible. I also let the brush go on the background.
NOTE: If you make a mistake and color something you didn't want or if you want to make little adjustments you can switch the brush to white as foreground and black as background, it will basically replace the area you're brushing.
When you're finished, select Layers>Merge>Merge Group and then Layers>Merge>Merge Visible.
The result:
Now we can repeat this process again for the dress. I'm going to add a Hue/Saturation/Lightness effect to black and white layer once more:
Hue: 0
Saturation: 31
Lightness: 0
Again, select the Mask option on your perviously merged layer and this time color the dress. We get this result:
(Don't forget to merge your layers when you're done)
Again, I'm going to duplicate my b/w image and color this one pinkish, for the subject's lips and cheeks.
I used Color Balance with these settings:
Hilights: 15, -11, -10
Shadows: 17, -15, -17
Midtones: 70, -11, -70
I'm also going to use this to color her eyes.
NOTE: When you do the cheeks I find it's best to use a very large brush and lower the opacity quite a bit. I used Size: 90; Hardness: 0; Opacity:46
The result:
Now I'm going to repeat the process, but I'm leaving the b/w image as b/w. This is going to make a HUGE difference, people! Create the mask and color the whites of her eyes and the black areas of the pupil.
The result:
Now you can finish with this, or add more effects.
I'm going to add a new layer filled with #010611 and set it to Exclusion. I also added text and a border, and here is my finished colorization:


